Showing posts with label DIY. Show all posts

Tuesday, November 4, 2014

We Are Featuring Our Coolest Wall Decals This Month!

Personalized Kitchen Wall Decal

Hello there,
We have a whole bunch of new Wall Decal designs that I would like to share with you! 

First up, we have our Caution Boys Decal Sticker to make a Gadget Board!  We spray painted a board bright yellow, and then we added the "Caution: Boys at Play" Decal with stripes. Once that was done, we added gadgets! A key and lock, door stop and fence latch are only a few ideas!  The gadgets can get costly so we offer the Caution Boys decal in a small or large size.  We have the small size displayed here.  You can see the larger size in action HERE.

Caution Boys at Play Decal Sticker

WD322

Second, we have our 'Masterpieces' Wall Decal! We were contacted by a customer to design a wall decal like one she had found on, yea you guessed it, on Pinterest. She wanted to put this above her children's art! So we came up with a few designs and this was the favorite. Naturally, we had to add this wall decal to our system to share the fun with you!

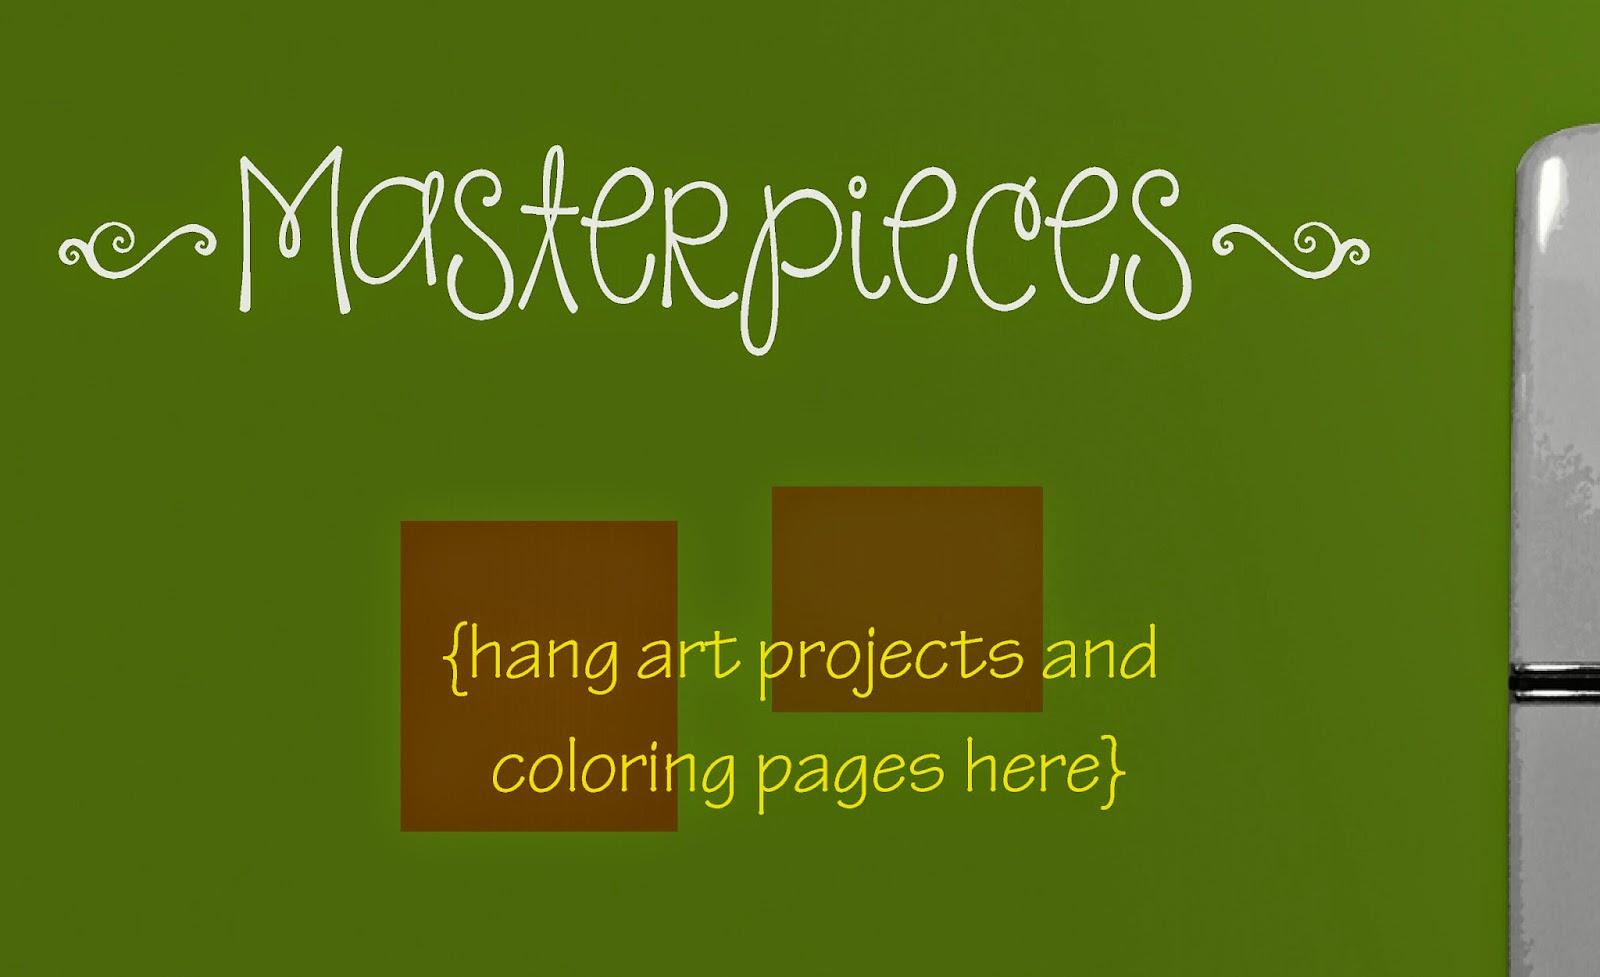
Masterpieces Wall Decal


Masterpieces Wall Decal

And then we have a few more new wall decals, that we didn't do projects with but are still really cute!

Personalized Always Kiss Me Goodnight

Good to be Home Mustache Wall Art


DA022-B


Thursday, October 2, 2014

How to Make a Grandchildren Brag Board with Clothespins

Here's something I've been wanting to do for a long time!  And then with the help of my manager (2 heads are always better than 1!), we have it accomplished... and I LOVE IT!


We tested out the use of a grandchildren wall decal that has been packaged for over a year to see if the wrinkles are any issue.  We found, when applying to this glossy painted smooth board, it was no issue at all.  We did have the wall sticker lying as shown above for about a week before we did the application.  This is something I recommend for all wall decals that come packaged in a roll.


 Here we show the beginning of application of the wall decal... where you use the hinge-method to apply a small part first.


 The Grandchildren board after we have the sticker applied.  

I am totally going to stock on more of this type of paint!  We had been using an acrylic craft paint previously .. but this paint made application of the wall decal SO much easier.  Plus we did not waste a foam brush nor did we have to come back the next day and apply a 2nd coat.  To get a good covering, we just sprayed a 2nd layer about 10 minutes after the first.


Here's where my manager was handy to have around.  I was struggling to get the clothespin nailed on properly.  She suggested flipping the top part off to the side - WooLaa - easy as pie now!

 I added wood glue under the clothespin along with nailing to keep it sturdier.

 AND... the finished project.. Grandchildren Brag Board!!  It just needs a couple grandkid pictures to display!


Wednesday, July 9, 2014

How To Use A Plastic Business Card As A Squeegee

Need some tips on how to make your decal stick to the wall? Use the following method to help your decal stay on the wall!

1. Take a tape measure or level and make sure your decal is straight on the wall.


2. Using the hinge method - Take the backing off a small section of the decal; place the sticky part (transfer tape) on the wall; make sure it sticks; peel the rest of the backing off; smooth onto the wall.

3. Grab the plastic business card that came in the package with your decal.


4. Gently, but with a constant pressure, rub the card all over the decal. This will ensure that the lettering will stick to the wall and not come off with the transfer tape.


Be sure to rub the entire decal! Missing one spot, even a small one, can cause the decal to rip as you take the transfer tape off!

If you have any troubles at all , check out our YouTube channel to see more how-to videos!

Have a fabulous day!
~ Cassie


Tuesday, May 13, 2014

8 Ways of Getting Ready for Camping this Summer

It's time to start thinking about what you and your family are doing for summer vacation! Going out of town? Planning a home away from home in your camper? And if you are, are you trying to clean up that camper so you can have it clean in the nick of time for that annual family camping trip? Here are a few ways you can clean it up and also jazz it up at the same time!

1. Haven't decided where to go for your camping trip? Take a road trip and go to one of our 401 national parks! Find what kind of campground suits you first and go from there! I can personally recommend the Grand Canyon National Park. It's fantastic! Words really can't describe how magnificent it really is!

2. Check out your local chamber of commerce to see where the nearest national park is and head out! There are plenty of family friendly campgrounds too!

3. Does the entire camper need to be cleaned? This blog has great tips on cleaning it from inside out! Like making sure the roof is in good condition, to the brakes and even tips on the refrigerator! And if you don't need to do the whole fifth wheel, scroll down to the section on cleaning the interior.

4. This Pinterest page has great ideas on how to utilize the small space of a 5th wheel!

5. Simply adding a wall sticker to the interior of your camper can jazz it up! It brings texture and dimension to what would normally be a non-usable space!

6. Don't like the inside of your camper anymore? Renovate it! The way this couple redid their 5th wheel was astounding! It also looks fabulous which is key to renovating.

7. If you like tenting it better than using the camper, find out what places are best for tents and venture out! Make it an adventure for the kids or just for yourself! Grab some friends and go!


8. Just for fun, here is a list of 25 things that will make life more fun and relaxed while camping!

Don't forget to have s'mores around the campfire while telling stories. Catch some fish or some rays of sunshine. Go on a hike. Take plenty of pictures. Create memories. This is what camping is really about. So, pitch a tent or park that camper and get out and enjoy your summer!!

~ Cassie

Monday, May 5, 2014

5 Ways to Guide Wedding Guests

Is your wedding reception a little far out in the country, or maybe a little hard to find? There are plenty of ways to help keep guests on the right track! Another thing that wedding guests may find somewhat confusing is what side to sit on. Help them out! Make a giant sign that no one could miss, and place it near the ceremony site.

Here are just a few tips to help you guide your guests, so that you can have a smooth wedding!

1. Buy a 30"x20" poster board, the wall sticker shown in the picture on the left. Then, put the sticker on the board and voila! You have a beautiful sign that none of your guests will miss!

2. Directions can be challenging even for the best navigators. So, help out your direction-challenged guests and make a road sign! This will help direct them to where your wedding reception is, and will also keep stragglers to a minimum, so the fun can begin on time!

3. Get creative and paint wooden signs! You know, the ones that are in the shape of an arrow? Those look so awesome and would be great with an outdoor theme wedding! Find ideas on Pinterest or have one made from Etsy!

4. Use balloons to mark the road where your reception site is located! Don't be afraid to use a giant bundle of them. Get them done in your colors, and add a wooden sign with them. Or spell out the bride and groom's name on all the balloons!
Via Google Images and CreativeCommons.org

5. Another creative idea for directions would be to make a card for guests! Written directions (as shown on the right) as well as a map would be extremely helpful to all!

Don't become too stressed out by all the little details of planning a wedding that you can't enjoy it! Delegate these smaller tasks out to bridesmaids or your maid of honor. I know they would be thrilled to help you out in any way they can.

Happy planning!
~ Cassie

Saturday, April 5, 2014

Spring Cleaning - Kitchen Style

Photo courtesy of HouseBeautiful.com
It's spring! Why not get ahead on the spring cleaning? Start by cleaning out all cupboards and drawers and turn them spotless again! Make a checklist to make sure you don't forget any appliance either small or large.

Add some new paint and get a pop of color into the kitchen! It will bring so much energy and warmth!

Turn that boring backsplash into something fun and maybe a little crazy! Better yet, paint the inside of your cupboards!! It's so creative and will really show off those fun dishes you love.

Organize your cupboards by adding labels to the jars or containers! We have some super cute labels specifically for this! Chalkboard vinyl was just added to our webiste and makes for super cute containers!

Area rug from Pier1
Bringing flowers into any room will instantly bring spring inside! Try adding a bouquet of flowers of all the same color. Add a pretty vase and instant spruce up!

Another way to bring flowers inside is an area rug! This is ideal for those who have spring allergies. Find one that fits your home at overstock.com, Pier1, and many more websites or stores!


Check out some of these 19 amazing ideas to spruce up your kitchen for cheap! They're so fun, and you would be astounded how easy some of them are!


Dandelion Set In Old Window Frame
Don't forget to add some wall art to help usher spring in! We have some lovely dandelion designs that would be perfect in the kitchen, or find one of our floral tea pot or tea cup wall stickers! 

Good luck cleaning, and I hope you find some fun ideas to get your kitchen ready for spring!
~ Cassie

Thursday, April 3, 2014

Redoing Your Not-So-Little Girl's Room

DA016-G
Are you getting ready to make a beautiful nursery for your new baby girl?  Or is it time to transform that nursery into a big girl room? I found some awesome design ideas that you could use to make that transformation easier! 

Use every color in the paint world arsenal! Make it a rainbow-like, color filled room! But don't forget to use a neutral color to tone down the boldness of the colors just a little.

Sayings and quotes are always a big hit. Find one that fits your daughter perfectly on our website!  We have stickers for baby girl nursery decor and big girl bedrooms!

Start early and add a little sophistication into your baby girl's life! Add her initials in a pretty monogram to the wall for a timeless effect! 
Chalkboard walls are always fun to do! It might take a bit more work for you, but the end result is awesome. Plus, while you get to draw and write on it now, in a few years she'll have so much fun making her own creations on it!

Zebra Alphabet with Name
You can always add a monogram sticker with her name to personalize her space, especially if she has to share a room with her sister! Or make it a zebra print monogram for some extra fun!

If you really, really want to use pink in her room (but don't want it to be too bold or even too sweet and pastel-like), add some dark browns or black to even out the pink tones.
Oh there are just so many ways to design a little girl's room! I hope these ideas help you get started and have fun planning and decorating!
~ Cassie

Thursday, March 27, 2014

Tis the season....for weddings!

Personalize your Mr & Mrs wall sticker now!
It's almost wedding season!! For all those planning out there, have you thought about using vinyl stickers to make banners, signs or even car decals?
We can help!! Wall Decor Plus More is debuting our new wedding category on our website!!!!

We are so excited to be helping all the brides out there! Are you having a tough time deciding who to have write your thank you sign, Just Married banner, or maybe a road sign? Custom design it with us! Choose from a variety of fonts and colors and make it all your own!

Make sure you know what you want your sign to say! We'll send you a preview of the wall stickers before we actually cut anything. We want to help make your big day perfect in every way! 

Maybe you're wishing you didn't have to spend so much time making a personalized "Just Married" banner for the getaway car? Order one from us and forget the hassle! This wall sticker is very versatile! You could apply it to a poster board or even better, to the back window of the car. It won't hurt it a bit! And with our indoor vinyl, it'll come off super easy!


Hopefully, all those brides out there don't really feel like making monogram signs by hand. We can help out with that too! Check out our fun designs and add them to table numbers, centerpieces, wine glasses or even the dance floor! 

I really hope all of this will help someone make their day special! Wall stickers will last as long as the festivities do, probably longer! Have fun planning and don't forget to check out our website to get ideas!

Happy planning!
Cassie

Wednesday, March 5, 2014

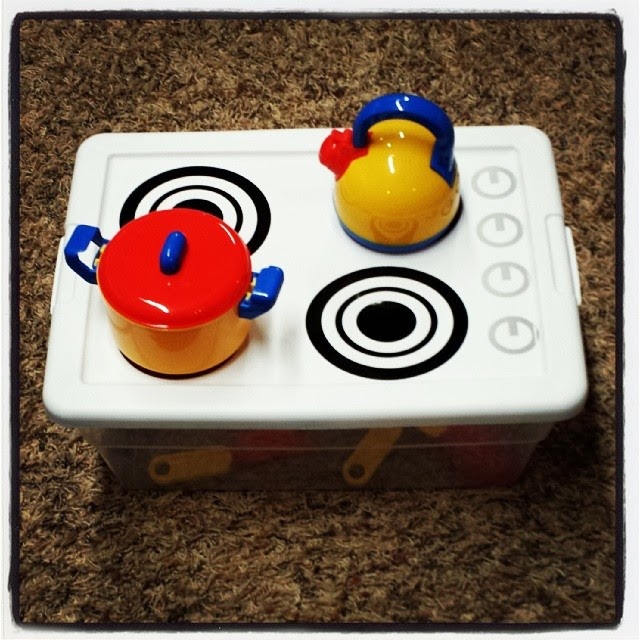
DIY Toy Stove for the Kiddos

Toys nowadays are so tech savvy, it amazes me that young kids even know how to use them! What happened to the good old fashioned outdoors, or even the games we made up using our imaginations?? Well, Wall Decor Plus More will try to bring some of them back by making our own toys.
You will need:
  • small or medium size plastic tote and lid
  • vinyl decals from yours truly
  • patience
Okay, so patience is just a suggestion if you want these stickers to go on smoothly and centered. The decals I mentioned are stove top decals. We are making our very own mini stove! And it even comes with storage for all the kitchen "utensils" your child will need! You can find those necessary utensils at Walmart for less than $15.

Now, for the instructions. Take the lid and make sure it is clear of dust and dirt. Set up the decals how you see them in the youtube video posted. Follow the rest of the directions and voila! You have your own play stove top for the
kiddos!

Enjoy "making" food with your little ones or sit back and watch them whip something up just for you!

Have a lovely day!
Cassie

Friday, February 28, 2014

DIY Photobooths!!

Have you ever taken a look at how much a photo booth could cost you for a wedding or another event?? Even when it's included in the wedding package from your photographer, it is not cheap. It could cost you $400 and up! Why not try it the old fashioned do-it-yourself way? A photo booth could be made for less than $50! You'll need supplies, so make a list before going out on your next big grocery run!
Supplies
  • Camera - Borrow from a family member or friend if need be!
  • Tripod - You don't want your pictures to be blurry! Ask your photographer if they have an extra one.
  • Backdrop - fabric, paper, board, it doesn't matter what it is as long as it's creative and unique!
  • Tape
  • Hammer and nails
  • Remote shutter release
  • Props- for whatever theme you are going for!
  • Poster board
  • Markers
  • Fishing Line
  • PVC Pipe
  • Personalized Decal Stickers
Make your own backdrop with a fabulous print fabric. Get in touch with your creative side! Use balloons as a backdrop to have something out of the ordinary!

You can always make a large picture frame or polaroid, or add glittery chevrons or stripes to a giant poster board! You can hang any of these from a large branch (if outdoors) or make a stand from PVC pipe and hang it from that!

Okay, you get the drift. If you want to go more complicated than this, try designing a digital booth (like the ones you would see in the mall or amusement park!).

Don't forget to tell everyone to take pictures, and just have fun with it!
Cassie

Wednesday, February 5, 2014

Decorating on a Budget! Using Wall Stickers, Slipcovers and more

Have you ever just wanted to rip everything out of a room and start fresh? I know I have. Unfortunately, not all of us have the means to do just that. So, let me help you out.
 Instead of throwing everything away, let's start with the basics. Budgeting is a wonderful way to get that new room you've always wanted, and just couldn't quite attain. Make sure to read these tips before starting too many projects at once!


A fresh paint color can be so refreshing and might even change your mind about redoing the whole room! Put a piece of art up on the wall, or find a wall sticker that really speaks to you! Wall decals are so simple to put up, no nails or hammers necessary. Just measure the space you want it in, pick a color you like and purchase! Wall Decor Plus More offers a wonderful variety of stickers, from kitchen quotes to children's rooms decorations.

Another idea for sprucing up a room, if you can't afford to get a new sofa or love seat, would be to find a slipcover for it. Surefit.com has some lovely covers for a reasonable price. Bed Bath & Beyond also has slipcovers, as does Walmart. This is a much more affordable process than buying a whole new sofa set! If that doesn't work, you could get that new pillow that has been calling your name! Or you could try making one just like the one you love. Get creative and go for it!

Don't forget to check out Pinterest for decorating on a budget! Check out Wall Decor Plus More on Pinterest as well! It is filled with all kinds of ideas, from  DIY coffee tables to redoing curtains. Pinterest also has lovely ideas for hanging pictures, making your own kitchen shelves, or even a headboard!

I hope you can find something that works for you! I am going to try some redecorating myself, and I'll let you know how it goes next week!

Have a wonderful weekend!
Cassie

Monday, February 18, 2013

What is the Best Paint or Surface for Wall Stickers?

Do you LOVE wall stickers?  And hope to use them on your next redecorating project?  If so, here is some great information to consider.

A satin or glossy paint is the best surface for applying wall stickers.  Enamel paint is the best since latex paint is more porous.

In my opinion, a shiny paint is better than the roughness of the texture.  If you have to choose between shiny paint and some texture or dull paint and no texture on your walls, it is best to stick with the shiny paint and texture.

Flat paint is too porous and doesn't allow the stickers to adhere well.

The stronger odor your new paint give off, the longer you should let the new paint cure before applying stickers.  The odor likely comes for the gases in the paint.  Those gases can break down the adhesive on the stickers, making them to not stick or fall off sooner than necessary.

Moisture behind your sheetrock can also be problematic for your wall stickers.  Think walls that back up to cooling systems, water pipes, overhead windows or windows that have been boarded up. These areas are prone to condensation that may not be obvious at the time of application.

Friday, August 24, 2012

Using Vinyl Stickers To Decorate An Old Window

Wall Decor Plus More was able to gain access to a bunch of old wooden windows!  We had a grand time decorating one of them up for all to see. 

The wooden frame was painted and then distressed to give it a vintage/antique look.  Next we designed a personalized sticker to fit the 2 ft by 2 ft glass area.  The design is personalized with the family name in gold.  We also coordinated the saying below the photo to highlight "family". 

The photo size displayed here is an 8x10.  There is space to update with a photo with a landscape orientation also and/or a larger photo.  The photo is just taped to the glass but you could get scrapbook corners and apply the photo to the back of the glass.  Another option is placing 2 smaller photos on each side of the large photo but covering up the swirls then too.

We have these windows available for purchase also.  We are not able to ship these.  You may pick up your window or stop and visit Wall Decor Plus More at one of our craft show booths this fall.  We can decorate them up for you ($45); you can purchase the stickers and decorate it yourself ($22), or you can purchase windows as is ($12). This window is approximately 2 ft by 2 ft. We do have one more smaller size also.  Contact us by email walldecorplusmore@goldenwest.net with purchase details.